
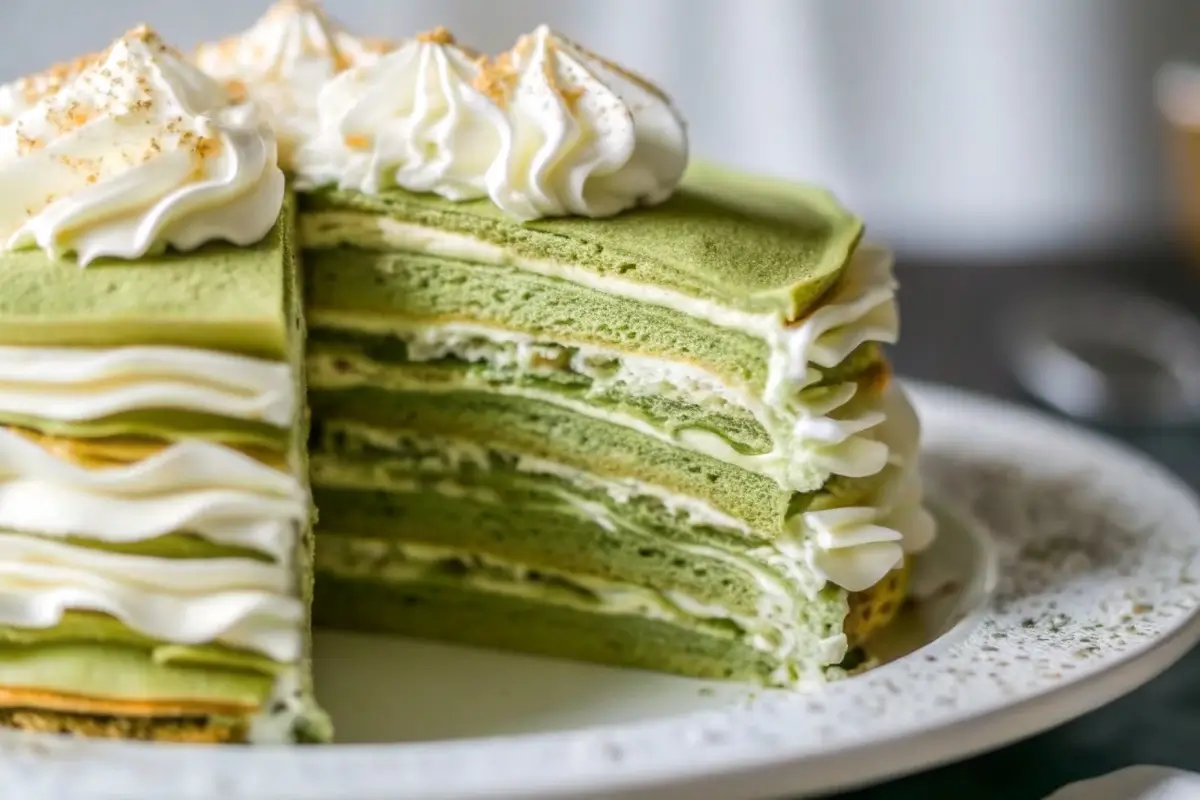
Matcha crepe roll cake is a delicate and elegant dessert that brings together the sophistication of French crepes and the bold, earthy essence of Japanese matcha. Unlike classic layered crepe cakes, this version features thin, matcha-infused crepes wrapped around a light, sweetened whipped cream filling, creating a stunning spiral effect. The result? A visually striking, melt-in-your-mouth treat that’s as delicious as it is beautiful.
With its vibrant green hue, subtle bitterness, and luxuriously creamy texture, this cake is a dream for matcha lovers and anyone who enjoys refined, delicate sweets. Whether you’re celebrating a special occasion or just treating yourself to something homemade, this guide will walk you through every step to mastering the perfect matcha crepe roll cake.
Here’s what we’ll cover:
- The essential ingredients and techniques for flawless crepes
- Step-by-step guidance to assemble a picture-perfect roll cake
- Pro tips for achieving soft, evenly cooked crepes
- Creative variations and serving ideas
Let’s get started and create a stunning, matcha-infused masterpiece!
“If you like products made from matcha, you might also enjoy Matcha Pan – a perfect balance of creaminess and chewiness!”
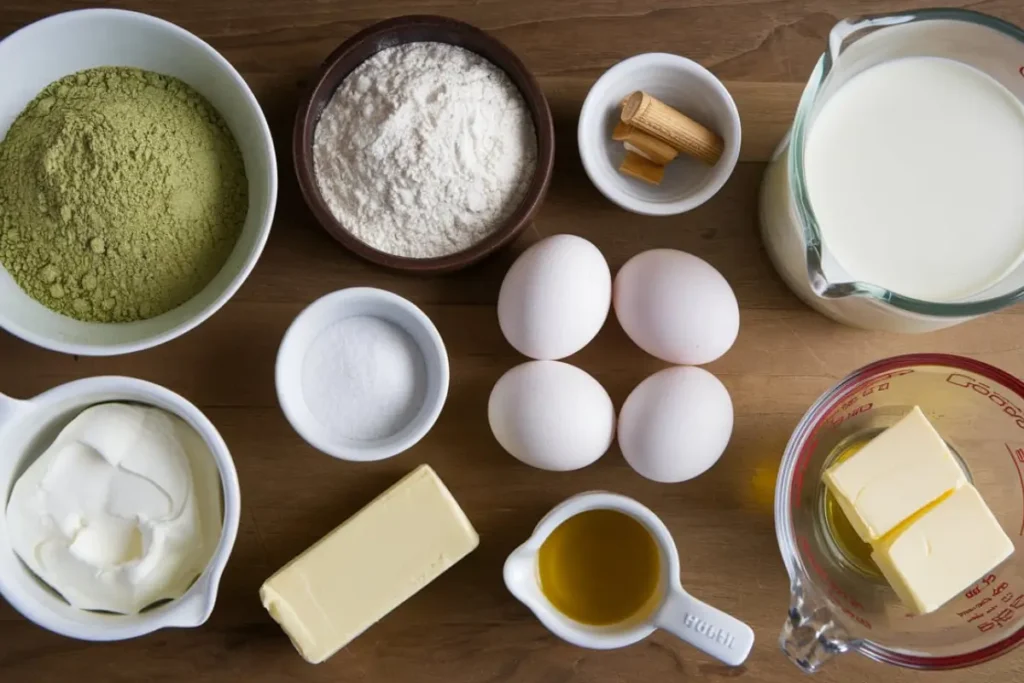
Key Ingredients for a Perfect Matcha Crepe Roll Cake
Crafting an exceptional matcha crepe roll cake starts with high-quality ingredients that enhance both texture and flavor. Each component plays a crucial role in balancing the earthy richness of matcha with the light sweetness of the filling.
Essential Ingredients Matcha Crepe Roll Cake
1. Matcha Powder
Matcha is the heart of this cake, providing its signature flavor and vibrant green color. Selecting the right matcha ensures both taste and visual appeal.
- Ceremonial-Grade Matcha – The highest quality, featuring a brilliant green hue and a smooth, slightly sweet taste. Primarily used for drinking but also works beautifully in desserts.
- Culinary-Grade Matcha – More affordable and slightly bitter, yet still excellent for baking.
💡 Pro Tip: Opt for high-quality matcha to avoid a dull color and overpowering bitterness.
2. Flour
The type of flour used directly impacts the texture and flexibility of the crepes.
- Cake Flour – Preferred for its low gluten content, resulting in softer, more delicate crepes.
- All-Purpose Flour – A suitable substitute, though it may yield slightly firmer crepes.
💡 Pro Tip: Sift the flour before mixing to ensure a smooth, lump-free batter.
3. Milk & Eggs
These ingredients provide moisture, richness, and structure to the crepes.
- Whole Milk – Creates a creamy texture, making the crepes tender and smooth.
- Eggs – Act as a binding agent, helping the crepes maintain flexibility and strength.
💡 Pro Tip: Slightly warm the milk before mixing—it helps dissolve sugar more effectively for a smoother batter.
4. Sugar & Sweeteners
A little sweetness balances matcha’s natural bitterness without overpowering its delicate notes.
- Granulated Sugar – A classic choice for lightly sweetening both the crepes and whipped cream.
- Honey or Condensed Milk – Enhances the depth of flavor in the whipped cream.
💡 Pro Tip: Keep sugar levels low to let matcha’s natural flavors shine through.
5. Whipping Cream (for the filling)
A light, airy whipped cream filling complements the thin crepes without overpowering them.
- Heavy Whipping Cream (36% fat or higher) – Creates a rich, stable texture that holds up well in the roll.
- Powdered Sugar – Stabilizes the whipped cream without a grainy texture.
- Vanilla Extract (Optional) – Adds a hint of warm sweetness.
💡 Pro Tip: Chill the cream and mixing bowl before whipping for the best consistency.
6. Butter & Cooking Oil
Butter enhances flavor, while a touch of oil prevents crepes from sticking.
- Unsalted Butter (Melted) – Improves both texture and taste in the batter.
- Neutral Oil (for cooking crepes) – Lightly brushing the pan keeps crepes smooth and non-stick.
💡 Pro Tip: Use a non-stick pan and grease it lightly before cooking each crepe.
Optional Ingredients for Customization Matcha Crepe Roll Cake
Want to make your matcha crepe roll cake extra special? Try these fun additions:
- Chocolate Ganache – Drizzle over the top for a decadent touch.
- Fresh Fruits (Strawberries, Mango, or Bananas) – Adds natural sweetness and vibrancy.
- Red Bean Paste (Anko) – A classic Japanese pairing with matcha.
How to Choose High-Quality Matcha
| Feature | High-Quality Matcha | Low-Quality Matcha |
|---|---|---|
| Color | Bright, vibrant green | Dull, yellowish-green |
| Flavor | Slightly sweet, mild bitterness | Overly bitter, grassy |
| Texture | Fine, smooth powder | Coarse, clumpy |
| Aroma | Fresh, grassy | Stale, dusty |
💡 Pro Tip: Store matcha in an airtight container, away from light and heat, to maintain freshness.
How to Make Matcha Crepe Roll Cake
Once you’ve gathered all the necessary ingredients, let’s dive into the step-by-step process to create the ideal matcha crepe roll cake. From mixing the batter to cooking the crepes, preparing the cream, and assembling the cake, this guide will help you create a mouthwatering dessert that will impress everyone.
Step 1: Preparing the Matcha Crepe Batte
To ensure delicate, smooth crepes that roll flawlessly, it’s important to have a lump-free batter.
Ingredients for Crepes Matcha Roll Cake:
- 1 cup (120g) cake flour
- 2 tablespoons matcha powder
- 2 tablespoons sugar
- ½ teaspoon baking powder (optional for fluffier crepes)
- 3 large eggs
- 1¾ cups (420ml) whole milk (warm)
- 1½ tablespoons melted unsalted butter
- ½ teaspoon vanilla extract (optional)
- Neutral oil (for cooking)
Instructions Matcha Crepe Roll Cake:
- Sift the Dry Ingredients: In a large bowl, sift the cake flour, matcha powder, sugar, and baking powder. This ensures that your batter is smooth and free of lumps.
- Whisk the Wet Ingredients: In another bowl, whisk the eggs and slowly pour in the warm milk while continuing to whisk to avoid curdling. Add the melted butter and vanilla extract (optional).
- Combine Wet and Dry: Gradually add the wet mixture to the dry ingredients, whisking to combine into a smooth batter.
- Strain the Batter: To achieve a silky smooth texture, pass the batter through a fine-mesh sieve to remove any remaining lumps.
- Let the Batter Rest: Cover the bowl and refrigerate the batter for at least 30 minutes, or up to 2 hours. This resting time helps relax the gluten, making the crepes softer.
💡 Pro Tip: If the batter thickens too much after resting, simply add a tablespoon of milk and stir until it’s the right consistency.
Step 2: Cooking the Crepes
Properly cooking the crepes is essential to ensure they’re flexible and easy to roll without cracking.
- Heat the Pan: Warm up a non-stick skillet or crepe pan on medium heat. Lightly brush the pan with neutral oil to prevent sticking.
- Pour and Swirl: Pour a small amount of batter into the pan, swirling gently to spread it into an even, thin layer.
- Cook the Crepes: Let the crepe cook for 1-2 minutes until the edges start to lift. Flip it and cook for an additional 30 seconds to 1 minute.
- Cool the Crepes: Once cooked, remove the crepe from the pan and let it cool on a plate. Continue cooking Use the remaining batter to make more crepes, stacking them as you go.
💡 Pro Tip: Make sure the crepes are thin and evenly cooked to ensure a smooth texture and easy rolling.
Instructions:
Heat the Skillet: Preheat a non-stick frying pan (8–10 inches) over low-medium heat.
Lightly Grease: Apply a small amount of neutral oil or melted butter to the pan, then wipe off any excess with a paper towel.
Pour and Swirl: Pour about ¼ cup (60ml) of the batter into the pan, immediately swirling it to evenly distribute the mixture.
Cook Gently: Allow the crepe to cook for about 1–2 minutes, or until the edges begin to lift.
Flip with Care: Gently flip the crepe using a spatula or your hands and cook for an additional 30 seconds.
Stack & Protect: Once cooked, place the crepe on a plate and cover it with parchment paper, then repeat with the remaining batter.
💡 Tip: Keep the crepes thin to ensure they are flexible—thicker crepes may crack when rolled.
Step 3: Preparing the Whipped Cream Filling
A soft and airy cream filling balances the rich flavor of matcha.
Ingredients for Whipped Cream:
- 1 cup (240ml) chilled heavy whipping cream
- 3 tablespoons powdered sugar
- ½ teaspoon vanilla extract (optional)
Instructions:
Chill the Tools: Place the mixing bowl and whisk in the freezer for 10 minutes before starting.
Whip the Cream: Use a hand or stand mixer to beat the chilled cream at medium speed until soft peaks form.
Incorporate Sugar: Gradually add powdered sugar and vanilla extract, continuing to beat until stiff peaks form.
Refrigerate: Keep the whipped cream cold until you’re ready to assemble.
💡 Tip: Avoid overwhipping the cream to prevent it from turning into butter.
Step 4: Rolling and Assembling the Matcha Crepe Cake
The fun part begins—layering the crepes and rolling them into a neat spiral!
Instructions:
- Arrange the Crepes: Lay a large sheet of parchment paper on your working surface. Position 4–5 crepes slightly overlapping in a horizontal row to form a long sheet.
- Apply the Cream: With an offset spatula, evenly spread a thin layer of whipped cream across the crepes. Be sure to leave a ½-inch border on the edges to avoid any overflow while rolling.
- Start Rolling: Begin rolling from one edge, gently guiding the crepes into a log shape with the help of the parchment paper.
- Secure and Chill: Wrap the crepe roll tightly in plastic wrap and refrigerate it for 1–2 hours to allow it to set. 💡 Tip: Rolling too loosely may leave gaps inside, while rolling too tightly may cause the crepes to tear.
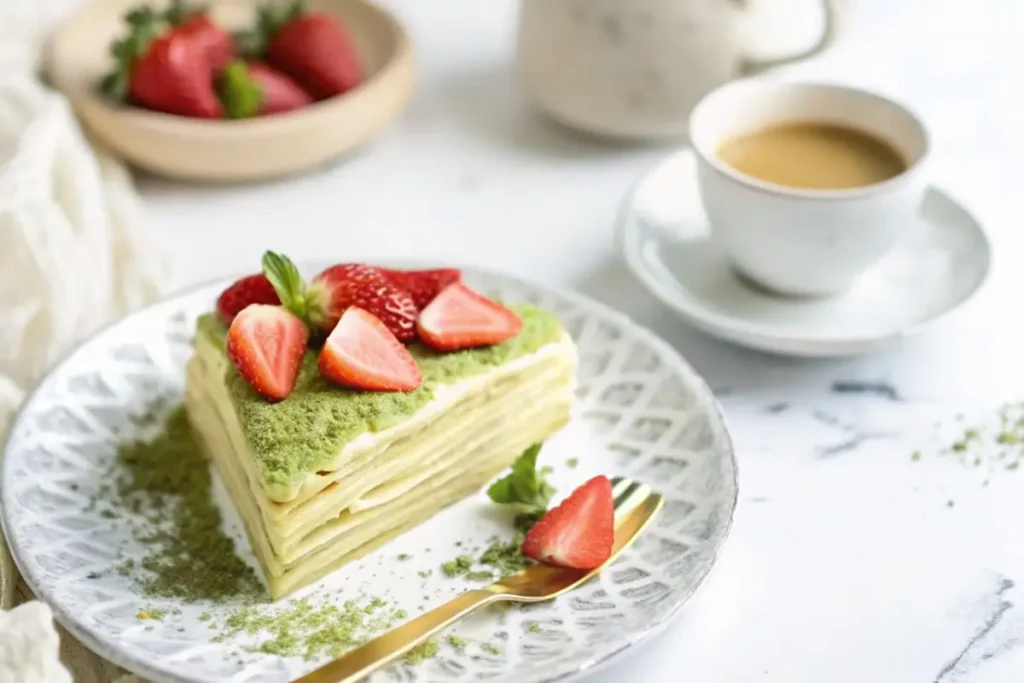
Step 5: Slicing and Serving
- Remove the Wrap: Carefully unwrap the plastic wrap and transfer the roll to a serving plate.
- Dust with Matcha: Using a fine-mesh sieve, lightly dust the top with matcha powder for a delicate touch.
- Slice Cleanly: With a sharp, serrated knife, slice the roll into even portions. Wipe the knife clean between cuts for a neater presentation.
- Serve Chilled: Enjoy your matcha crepe roll cake alongside a hot cup of matcha or green tea. 💡 Tip: For a firmer texture, freeze the roll for about 20 minutes before slicing.
Frequently Asked Questions About Matcha Crepe Roll Cake
Here are some common questions answered to help you better understand the distinct flavor, texture, and characteristics of matcha crepe roll cake.
What does matcha crepe cake taste like?
Matcha crepe cake offers a harmonious flavor profile, with the matcha powder providing a slight bitterness and earthy undertones, while the whipped cream adds a mild sweetness. The overall texture is soft, creamy, and light, creating a refreshing dessert that’s not too heavy or rich.
💡 Tip: Using high-quality matcha enhances the flavor, ensuring a smoother and more refined taste without excessive bitterness.
How does matcha cake taste compared to regular cake?
Matcha cake has a subtle, grassy flavor that resembles green tea, paired with a hint of bitterness and balanced sweetness. Unlike traditional cakes, it’s less sugary and offers a more delicate, nutty flavor profile. Matcha pairs beautifully with flavors like vanilla, white chocolate, and red bean.
💡 Tip: To emphasize the natural bitterness of matcha, reduce the sugar in your filling.
How does a crepe cake differ from a traditional cake?
Crepe cakes consist of thin layers of crepes, stacked with cream in between, while traditional cakes are made with baked sponge layers. Crepe cakes have a soft, melt-in-your-mouth texture, while regular cakes tend to be fluffier and more structured. Additionally, crepe cakes don’t require baking, which makes them a great option for those without an oven.
💡 Tip: Allowing the crepes to rest before assembly helps them absorb moisture from the cream, making the texture even softer.
How are Japanese roll cakes different from Swiss roll cakes?
Japanese roll cakes are known for their light, airy texture and moisture, often filled with whipped cream rather than buttercream or jam. They are delicate and soft, while Swiss roll cakes are firmer and typically sweeter. Japanese roll cakes are ideal for pairing with matcha due to their subtle and soft texture.
💡 Tip: The light texture of Japanese roll cakes perfectly complements the earthy taste of matcha.
Conclusion
Matcha crepe roll cake is a delightful fusion of Japanese flavors and French pastry techniques, offering a balance of earthy matcha, tender crepes, and light whipped cream. Its no-bake approach makes it an easy yet impressive dessert for bakers of all levels. Whether enjoyed as-is or with variations like chocolate, fruit, or red bean fillings, it’s sure to become a crowd-pleaser.
Follow the steps in this guide to create a soft, flavorful matcha crepe roll cake that’s as beautiful as it is delicious. Ready to make your own? Gather your ingredients, prepare your batter, and savor the creamy,
Print
The Best Matcha Crepe Roll Cake Recipe: 5 Steps to Sweet Perfection!
Description
Matcha crepe roll cake is a delicate and elegant dessert that brings together the sophistication of French crepes and the bold, earthy essence of Japanese matcha. Unlike classic layered crepe cakes, this version features thin,
Ingredients
-
- 1 cup (120g) cake flour
-
- 2 tablespoons matcha powder
-
- 2 tablespoons sugar
-
- ½ teaspoon baking powder (optional for fluffier crepes)
-
- 3 large eggs
-
- 1¾ cups (420ml) whole milk (warm)
-
- 1½ tablespoons melted unsalted butter
-
- ½ teaspoon vanilla extract (optional)
-
- Neutral oil (for cooking)
Instructions
- Arrange the Crepes: Lay a large sheet of parchment paper on your working surface. Position 4–5 crepes slightly overlapping in a horizontal row to form a long sheet.
- Apply the Cream: With an offset spatula, evenly spread a thin layer of whipped cream across the crepes. Be sure to leave a ½-inch border on the edges to avoid any overflow while rolling.
- Start Rolling: Begin rolling from one edge, gently guiding the crepes into a log shape with the help of the parchment paper.
- Secure and Chill: Wrap the crepe roll tightly in plastic wrap and refrigerate it for 1–2 hours to allow it to set. 💡 Tip: Rolling too loosely may leave gaps inside, while rolling too tightly may cause the crepes to tear.