
Introduction
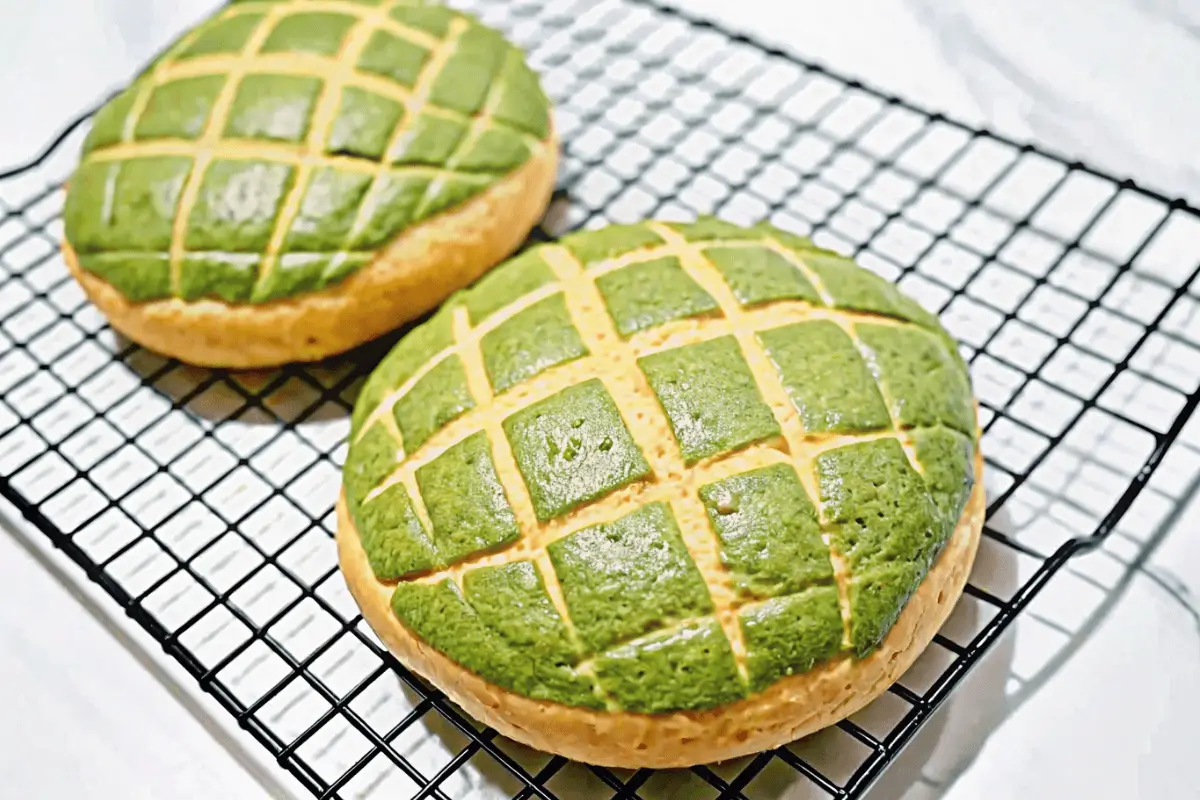
Imagine biting into a soft, fluffy piece of bread infused with the rich, earthy flavor of matcha green tea—delicately sweet, subtly bitter, and utterly irresistible. That’s Matcha Pan, a delightful fusion of Japanese tradition and modern baking that has captured the hearts of pastry lovers worldwide.
Matcha has long been a staple in Japanese culture, cherished for its deep, umami-rich taste and numerous health benefits. But when combined with the comforting texture of freshly baked bread, it transforms into something magical. If you love matcha lattes or green tea desserts, this is a must-try recipe that brings bakery-level quality right to your kitchen!
One of the best things about Matcha Pan is its versatility. Whether you prefer a classic loaf, sweet rolls, or filled pastries, there’s a version for every craving. Plus, making it at home allows you to control the sweetness, fillings, and texture, ensuring the perfect balance of flavors. It’s fresher, more cost-effective, and incredibly rewarding.
If you’ve ever tried our Japanese Melon Pan recipe, you’ll find this just as delightful—only with a uniquely earthy twist. Ready to bake? Let’s dive into the world of Matcha Pan and discover three delicious ways to master this Japanese classic!
What is Matcha Pan?
The name Matcha Pan might sound fancy, but don’t let that intimidate you! The Japanese adopted the word “pan” for bread due to interactions with Portuguese explorers during the Nanban trade period (16th century), reflecting the era’s cross-cultural influences. So, in essence, Matcha Pan just means Matcha Bread—but with a flavorful, fun twist.
Shared meals have always been a universal language of care — no matter who you’re cooking for? Well, this holds especially true when matcha is involved! Matcha lovers swear by its rich, almost umami-like depth, making this bread an instant favorite. Whether enjoyed as a morning treat, an afternoon snack, or a unique gift, Matcha Pan is an easy and delicious way to impress family and friends.
Now, enough talking—let’s get baking!
Why You’ll Love This Matcha Pan Recipe
- A Unique Flavor Experience – The deep, earthy notes of matcha blend perfectly with the subtle sweetness of the bread, creating a balanced and sophisticated taste.
- Save Money by Making It at Home – Specialty bakeries charge a premium for matcha-based pastries, but with this simple recipe, you can enjoy fresh, bakery-style Matcha Pan anytime!
- Customizable and Fun to Make – Whether you love a classic loaf, soft rolls, or filled pastries, this recipe lets you experiment with flavors, textures, and add-ins like red bean paste or white chocolate.
If you’re a fan of Japanese Milk Bread, you’ll love the soft and pillowy texture of Matcha Pan. Ready to give it a try? Let’s get started!
How to Make Matcha Pan
Quick Overview
Matcha Pan is surprisingly easy to make, requiring just a few essential ingredients and simple steps. Whether you’re a seasoned baker or a beginner, this recipe is accessible and fun. The total prep and baking time is under 2 hours, making it perfect for weekend baking or a special homemade treat.
Key Ingredients for Matcha Pan
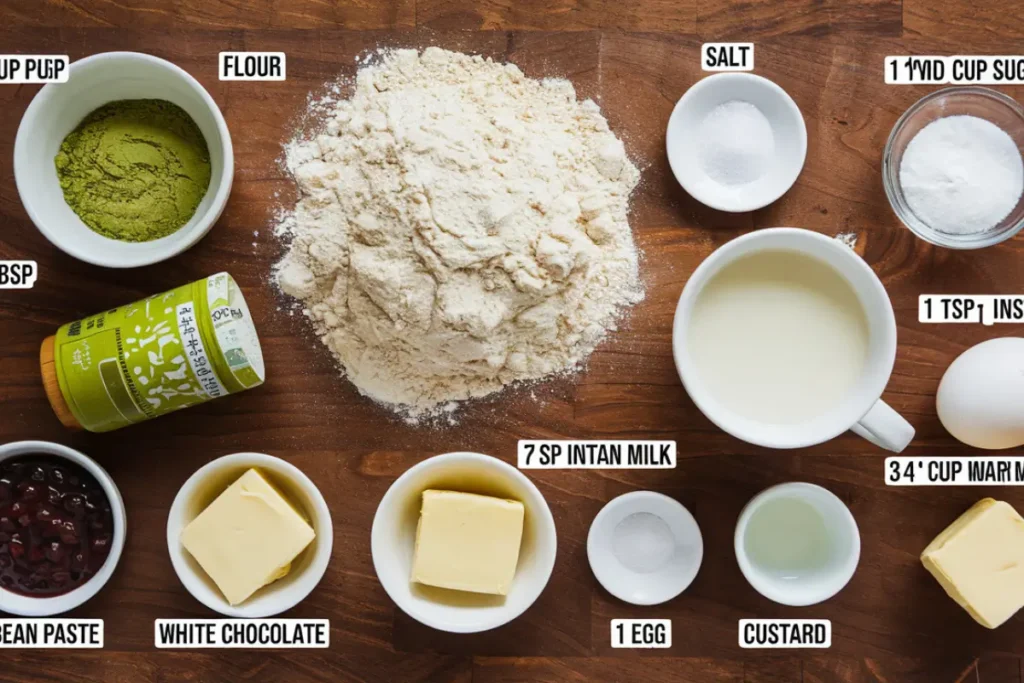
- 3 cups all-purpose flour
- 2 tbsp matcha powder (culinary grade for best flavor)
- 1/4 cup sugar
- 1 tsp salt
- 1 tbsp instant yeast
- 3/4 cup warm milk
- 1 egg
- 3 tbsp butter, softened
- Optional Fillings: Red bean paste, white chocolate, or custard
Step-by-Step Instructions
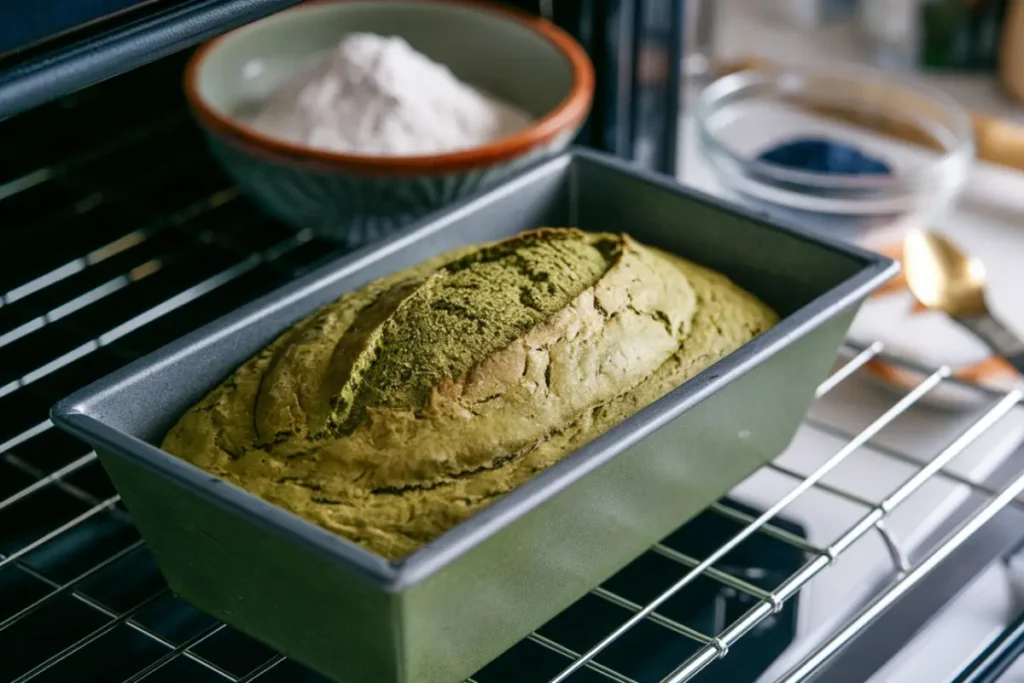
Method 1: Traditional Matcha Pan (Bread Loaf)
- Mix dry ingredients – In a large bowl, combine flour, matcha powder, sugar, and salt.
- Activate the yeast – Dissolve yeast in warm milk and let sit for 5 minutes.
- Introduce the yeast blend– and egg to the dry components, stirring in a circular motion to form a uniform batter.. Mix until a dough forms.
- Spend a full 10 minutes kneading: push the dough away, fold it over, and rotate. Repeat until the surface is glossy and the dough stretches without tearing.
- Rest & Expand :Let the covered dough sit undisturbed in a draft-free area until it doubles in bulk, about 1–2 hours. A gentle poke should leave a slow-to-rebound indent.
- Final Bake:Arrange the dough in a parchment-lined or oiled loaf pan. Bake at 175°C (350°F) for approximately 30 minutes, rotating the pan halfway for even browning.
Method 2: Matcha Pan Rolls (Sweet Buns)
- Follow steps 1-5 from the loaf method.
- Divide and Flatten Cut the dough into small, uniform sections. Roll or pat each piece into a thin disk, roughly ¼-inch (6 mm) thick.
- Add filling (if using) and shape into round buns.
- Pre-Bake Rest Transfer the buns to a lightly greased baking sheet. Allow them to undergo a final rise (30 minutes) in a warm, draft-free spot until they nearly double in volume.
- Bake at 350°F (175°C) for 15-20 minutes.
Method 3: Matcha-Stuffed Pastries (Advanced)
- Make a pastry dough using flour, butter, salt, and ice water.
- Roll out dough and cut squares.
- Add filling (matcha white chocolate or custard) and seal edges.
- Bake at 375°F (190°C) for 20 minutes.
What to Serve Matcha Pan With
- Japanese Green Teas – Sencha, Hojicha, or a creamy Matcha Latte.
- Fresh Fruits – Strawberries, yuzu, or citrus slices enhance the flavors.
- Dessert Pairings – Serve with mochi or a drizzle of condensed milk for extra indulgence.
Dietary Alternatives
| Need | Substitute |
|---|---|
| Dairy-Free | Plant-based milk & butter |
| Gluten-Free | Gluten-free flour |
| Low-Sugar | Coconut sugar |
| Egg-Free | Flaxseed or chia eggs |
Top Tips for Perfecting Matcha Pan
- Use High-Quality Matcha – Culinary-grade matcha gives the best balance of flavor and color.
- Adjust Sweetness – If you prefer a sweeter bread, increase sugar or add a drizzle of honey.
- Knead Properly – This ensures a fluffy, airy texture.
- Avoid Overbaking – Check doneness by tapping the bread—if it sounds hollow, it’s ready!
Storing and Reheating Tips
- Room-Temp Guidelines For non-refrigerated storage, use a tightly closed container and enjoy within 3 days.
- Chilled Preservation Keep chilled at or below 40°F (4°C) for optimal safety and texture. Use within 7 days.
- Long-Term Freezer Storage Wrap the item tightly in plastic wrap or foil, then place in a freezer-safe bag. Store frozen for up to 90 days.
- Reheating: Warm in an oven at 300°F (150°C) for 5 minutes to restore freshness.
If you are suffering from how to lose weight you can check out our Pink Salt recipe 7 Simple Ways to Burn Fat
FAQs About Matcha Pan & Matcha: Your Questions Answered
1. Daily Consumption
Q: Could drinking matcha every day be bad for me?
A: Yes! Drinking 1–2 cups of matcha daily is safe and beneficial. Packed with antioxidants like catechins and amino acids (such as L-theanine), it boosts energy and focus while promoting calmness. Just monitor caffeine intake (≈35mg per cup).
2. Health Benefits
Q: What does matcha do for your body?
A: Matcha’s unique composition offers multiple benefits:
- Antioxidant Powerhouse: Fights free radicals with EGCG, a potent catechin.
- Sustained Energy: L-theanine balances caffeine, avoiding jitters or crashes.
- Metabolic Support: Enhances fat oxidation and heart health.
- Cognitive Boost: Improves memory and concentration.
3. Essential ToolsQ: What tools do I need for matcha or baking matcha pan?
A:
Traditional Matcha Tools:
- 🎍 Chasen (bamboo whisk): Creates a silky, clump-free texture.
- 🍵 Chawan (wide tea bowl): Perfect for whisking and serving.
- 📏 Chashaku (bamboo scoop): Measures precise 1-2g servings.
- For Matcha Pan Baking:
- Sieve (to sift matcha powder), dough hook, and rolling pin.
4. Weight Loss & Belly Fat
Q: Can matcha burn belly fat?
A: While not a magic fix, studies suggest matcha’s EGCG boosts metabolism and fat oxidation during workouts. For best results, pair it with a balanced diet and exercise.
Pro Tips for Readers
- Quality Matters: Use ceremonial-grade matcha for drinking and culinary-grade for baking.
- Daily Caffeine Cap: Health experts recommend 1–2 cups per day to avoid jitters, insomnia, or dependency.
- Pair Creatively: Add matcha to lattes, smoothies, or baked goods like matcha pan for versatility.
Conclusion & Final Thoughts
Matcha Pan is a delicious, versatile bread that brings the rich flavors of matcha into your home kitchen. Whether you prefer a simple loaf, soft rolls, or indulgent pastries, there’s a method for everyone. Plus, making it at home lets you experiment with fillings, sweetness, and textures to match your taste.
Why not try making Matcha Pan today? Share your creations on social media and tag us—we’d love to see your results! For more Japanese-inspired recipes, be sure to check out our other baking guides. Happy baking! 🍵🥖
and stay updated with the latest recipes and baking tips by following GastronomyRecipes on Facebook.
Print
Matcha Pan
- Total Time: 53 minute
- Diet: Vegetarian
Description
Imagine biting into a soft, fluffy piece of bread infused with the rich, earthy flavor of matcha green tea—delicately sweet, subtly bitter, and utterly irresistible. That’s Matcha Pan, a delightful fusion of Japanese tradition and modern baking that has captured the hearts of pastry lovers worldwide.
Ingredients
Key Ingredients for Matcha Pan
-
- 3 cups all-purpose flour
-
- 2 tbsp matcha powder (culinary grade for best flavor)
-
- 1/4 cup sugar
-
- 1 tsp salt
-
- 1 tbsp instant yeast
-
- 3/4 cup warm milk
-
- 1 egg
-
- 3 tbsp butter, softened
-
- Optional Fillings: Red bean paste, white chocolate, or custard
Instructions
Step-by-Step Instructions
Method 1: Traditional Matcha Pan (Bread Loaf)
-
- Mix dry ingredients – In a large bowl, combine flour, matcha powder, sugar, and salt.
-
- Activate the yeast – Dissolve yeast in warm milk and let sit for 5 minutes.
-
- Introduce the yeast blend– and egg to the dry components, stirring in a circular motion to form a uniform batter.. Mix until a dough forms.
-
- Spend a full 10 minutes kneading: push the dough away, fold it over, and rotate. Repeat until the surface is glossy and the dough stretches without tearing.
-
- Rest & Expand :Let the covered dough sit undisturbed in a draft-free area until it doubles in bulk, about 1–2 hours. A gentle poke should leave a slow-to-rebound indent.
-
- Final Bake:Arrange the dough in a parchment-lined or oiled loaf pan. Bake at 175°C (350°F) for approximately 30 minutes, rotating the pan halfway for even browning.
Method 2: Matcha Pan Rolls (Sweet Buns)
-
- Follow steps 1-5 from the loaf method.
-
- Divide and Flatten Cut the dough into small, uniform sections. Roll or pat each piece into a thin disk, roughly ¼-inch (6 mm) thick.
-
- Add filling (if using) and shape into round buns.
-
- Pre-Bake Rest Transfer the buns to a lightly greased baking sheet. Allow them to undergo a final rise (30 minutes) in a warm, draft-free spot until they nearly double in volume.
-
- Bake at 350°F (175°C) for 15-20 minutes.
Method 3: Matcha-Stuffed Pastries (Advanced)
-
- Make a pastry dough using flour, butter, salt, and ice water.
-
- Roll out dough and cut squares.
-
- Add filling (matcha white chocolate or custard) and seal edges.
-
- Bake at 375°F (190°C) for 20 minutes.
Notes
✔ Best eaten fresh but can be stored in an airtight container for up to 2 days.
✔ Reheat in the oven at 300°F for a few minutes to restore crispness.
✔ Serve with matcha latte, milk, or coffee for a perfect pairing!
- Prep Time: 2 hours 5 minutes
- Cook Time: 20-25 minutes
- Method: Baking
- Cuisine: Japanese
Nutrition
- Calories: ~280 kcal
- Sugar: ~15g
Keywords: Matcha Pan, Japanese Sweet Bread, Matcha Melon Pan, Melon Pan Recipe, Matcha Dessert